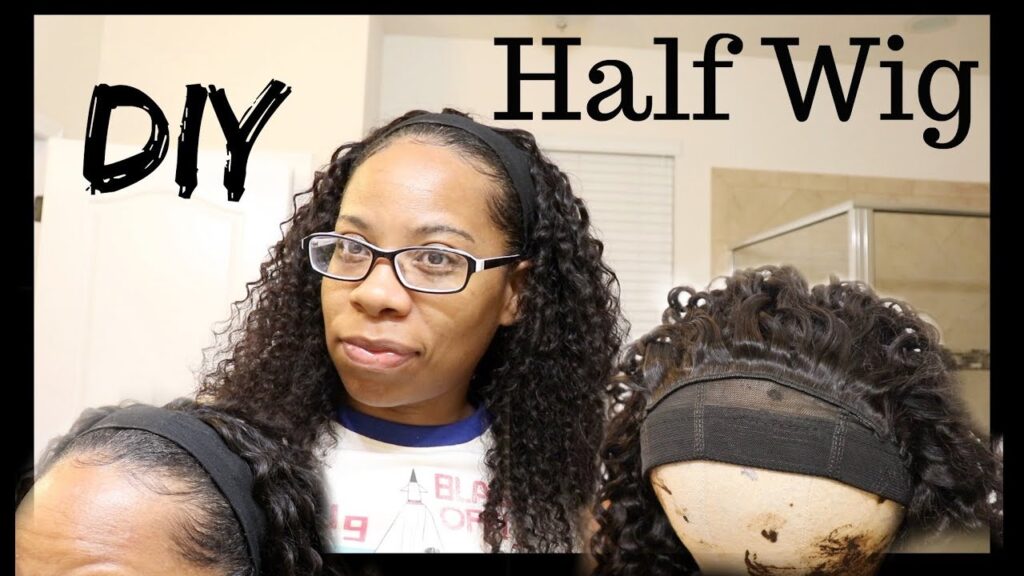
Half wigs have become a popular solution for people who want to change their hairstyle without committing to a permanent look. Unlike full wigs, half wigs cover only the back portion of your head while leaving your natural hairline exposed at the front. This creates a more natural appearance and gives you the flexibility to blend your own hair with the wig seamlessly.
Making your own half wig might sound complicated, but it’s actually a manageable project once you understand the basics. You’ll save money compared to buying ready-made options, and you can customize everything from the hair texture to the exact measurements that fit your head perfectly.
What Is a Half Wig?
A half wig is a hairpiece that covers the crown and back of your head while leaving the front hairline free. You use your natural hair at the front to blend with the wig, creating the illusion of a full head of natural hair.
The base of a half wig typically includes combs or clips that secure it to your head. Some designs also feature adjustable straps for a tighter fit. The main advantage is that you can style your natural front hair however you like while the wig provides volume and length in the back.
People use half wigs for different reasons. Some want to add length or volume without damaging their natural hair. Others use them to cover thinning areas while keeping their hairline natural. They’re also great for protective styling, giving your natural hair a break from daily manipulation and heat styling.
Why Make Your Own Half Wig?
Creating your own half wig offers several benefits that you won’t get from store-bought options.
Cost savings stand out as the biggest advantage. Professional half wigs can cost anywhere from £50 to £300 or more. When you make your own, you’ll spend roughly £30 to £80 on materials, depending on the quality of hair you choose.
Perfect customization is another major benefit. You control the hair type, color, length, texture, and density. You can match your natural hair exactly or create the specific look you’ve been dreaming about. The cap size will fit your head precisely because you’re making it according to your measurements.
Quality control matters too. You know exactly what materials go into your wig. You can choose premium hair and construction methods that might not be available in your price range for ready-made wigs.
Materials You’ll Need
Before starting your half wig project, gather these essential materials:
For the base:
- Wig cap or mesh dome cap
- Elastic band (1/2 inch width)
- Wig combs or clips (3 to 4 pieces)
- Adjustable strap (optional)
- Thread that matches your hair color
- Needle for hand sewing
For the hair:
- Hair bundles or wefts (2 to 3 bundles for medium density)
- Closure or frontal piece (optional, for more natural parting options)
Tools:
- Scissors
- Measuring tape
- Wig head or mannequin
- Pins
- Sewing machine (optional but helpful)
You can find these materials at beauty supply stores or online retailers. For quality hair, look for vendors that specialize in hair extensions. Human hair creates the most natural look but costs more than synthetic options.
How to Make a Half Wig Step by Step
Step 1: Take Your Measurements
Measure around your head where the wig will sit. Start from one ear, go around the back of your head, and end at the other ear. This determines how much elastic you’ll need.
Measure from ear to ear across the top of your head to know how wide your wig base should be. Also measure from the crown of your head down to where you want the wig to end.
Write down these measurements. Accuracy here prevents a wig that’s too tight or too loose.
Step 2: Create the Wig Cap Base
Cut your wig cap to match your measurements. If you’re using a dome cap, you might need to cut it smaller to fit just the back portion of your head.
Fold the front edge of the cap and sew it down to create a clean, finished edge. This part will sit against your natural hair, so make it as smooth as possible.
Cut your elastic band to the length you measured from ear to ear, adding an extra inch for seam allowance. Sew the elastic along the front edge of the cap where it will meet your hairline. This elastic should be slightly stretched as you sew to ensure a snug fit.
Step 3: Attach the Combs
Position wig combs inside the cap. Place one on each side near the ears and one or two at the crown area. These combs will anchor the wig to your natural hair.
Sew the combs securely using strong thread. Make multiple passes through each hole in the comb to ensure they won’t pull out during wear.
Step 4: Prepare Your Hair Wefts
If your hair bundles aren’t already in weft form, you’ll need to create wefts. Most purchased bundles come ready to sew, with the hair already attached to a thin strip of fabric.
Start with the longest wefts for the bottom layers. Measure the width of your cap and cut the weft to match, leaving a small amount of fabric on each end to prevent unraveling.
Step 5: Sew the Wefts
Pin your wig cap to the mannequin head. This keeps everything stable while you work.
Begin at the bottom edge of the cap. Position your first weft along the edge and pin it in place. Using a curved needle and strong thread, sew the weft to the cap using a backstitch or whip stitch. Keep your stitches close together for security.
Work your way up the cap, adding wefts in rows. Leave about half an inch to an inch between each row, depending on how thick you want the wig. Overlap the rows slightly if you want more density.
Continue until you reach the crown area. The top of the wig needs special attention because this is where people might see the cap if you part your hair.
Step 6: Add a Closure (Optional)
If you want the option to create parts in your wig, sew a closure piece at the crown. A closure is a small piece of lace or silk with hair hand-tied to it that mimics a natural scalp.
Position the closure where you want your part to be. Sew around all edges of the closure, attaching it securely to the cap. This step requires patience but creates the most natural-looking result.
Step 7: Finishing Touches
Trim any excess thread and check that all wefts are secure. Gently tug on the hair to test your stitching.
If you want an adjustable fit, attach an elastic strap at the nape area. This allows you to tighten or loosen the wig as needed.
Try the wig on and check the fit. The combs should grip your hair securely, and the elastic should sit comfortably against your hairline without being too tight.
Styling Your Half Wig
Once your half wig is constructed, you can style it just like natural hair if you used human hair. Cut the hair to your desired length and add layers if you want more movement and dimension.
Blend your natural hair with the wig by leaving out your edges and front hairline. Style this natural hair to frame your face, then secure the wig behind it. The transition should be invisible when done correctly.
Use a flat iron or curling iron to match the texture of the wig to your natural hair. This creates a seamless blend that looks completely natural.
Tips for Success
Choose quality hair that matches your natural texture as closely as possible. This makes blending much easier and creates a more convincing look.
Don’t rush the sewing process. Secure stitching is what makes your wig last. Weak stitches lead to wefts falling out after just a few wears.
Practice on cheaper materials first if you’re new to wig making. Make a practice wig with synthetic hair before investing in expensive human hair.
Ventilate your cap by leaving small gaps between wefts or using a cap material with good airflow. Your scalp needs to breathe, especially if you’ll wear the wig for long periods.
Common Mistakes to Avoid
Many first-time wig makers sew wefts too close together, creating an unnaturally thick wig that’s heavy and uncomfortable. Space your wefts appropriately for the most natural look.
Using thread that doesn’t match your hair color is another common error. The thread might show through, especially at the part or when the hair moves.
Forgetting to seal weft ends after cutting them causes shedding. Apply a thin line of fabric glue to cut ends to prevent the hair from falling out.
Making the cap too small is a frequent problem. Remember that the cap should fit comfortably, not tightly. A too-small wig causes headaches and doesn’t stay secure.
Caring for Your Half Wig
Proper maintenance extends the life of your homemade half wig significantly. Wash it every 7 to 10 wears using sulfate-free shampoo and conditioner. Handle it gently while wet because this is when the hair is most fragile.
Store your wig on a mannequin head or wig stand to maintain its shape. Cover it with a silk or satin scarf to prevent dust buildup.
Avoid excessive heat styling, even with human hair wigs. High temperatures damage the hair over time, causing it to become brittle and dry.
Deep condition the wig monthly to keep the hair soft and manageable. Human hair wigs need moisture just like natural hair does.
Benefits of Half Wigs
Half wigs offer versatility that full wigs can’t match. You keep your natural hairline, which is the hardest part of a wig to make look natural. This instantly makes your wig more convincing.
They’re also more comfortable, especially in warm weather. With less coverage, your scalp stays cooler and experiences less itching or irritation.
Installation takes less time compared to sew-in extensions or full wigs. You can put on a half wig in under five minutes once you get the hang of it.
The protective styling aspect helps your natural hair grow and stay healthy. Your hair experiences less daily manipulation, heat, and environmental damage.
For more information on hair care and styling tips, visit Dot Daily where you’ll find helpful resources for maintaining healthy hair and accessories.
Potential Challenges
Making a half wig requires patience and some basic sewing skills. Your first attempt might not turn out perfect, and that’s completely normal. Consider it practice and don’t get discouraged.
The initial time investment can be significant. Expect to spend 3 to 6 hours on your first wig, depending on your skill level and the complexity of your design.
Finding quality materials at reasonable prices takes research. Not all hair suppliers are reliable, so read reviews carefully before purchasing.
Final Thoughts
Creating your own half wig is a rewarding project that gives you a custom hairpiece at a fraction of the cost of professional options. The process requires attention to detail and patience, but the result is worth the effort.
Start with simple designs and work your way up to more complex constructions as your skills improve. Each wig you make will be better than the last as you learn what techniques work best for you.
The ability to create exactly what you want, when you want it, gives you control over your look that ready-made wigs simply can’t provide. Whether you need a half wig for everyday wear, special occasions, or protective styling, making your own ensures you get exactly what you’re looking for.
Shahid Maqsood is an Editor and Content Strategist with 5 years of experience in digital media and content publishing. He holds an MBA and a Master’s degree in Mass Communications, combining business insight with editorial expertise. Shahid specializes in biography writing, technology, and business news — crafting content that is accurate, well-researched, and reader-first. He currently leads editorial strategy at Dot Daily, ensuring every story meets the highest standards of clarity and credibility. Connect on LinkedIn